How to prepare SVGs for cutting in Design Space
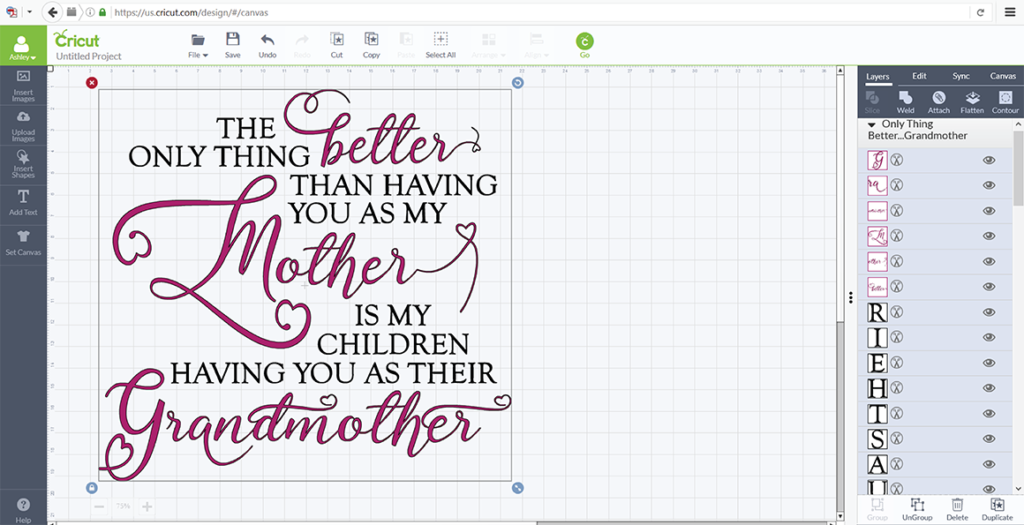
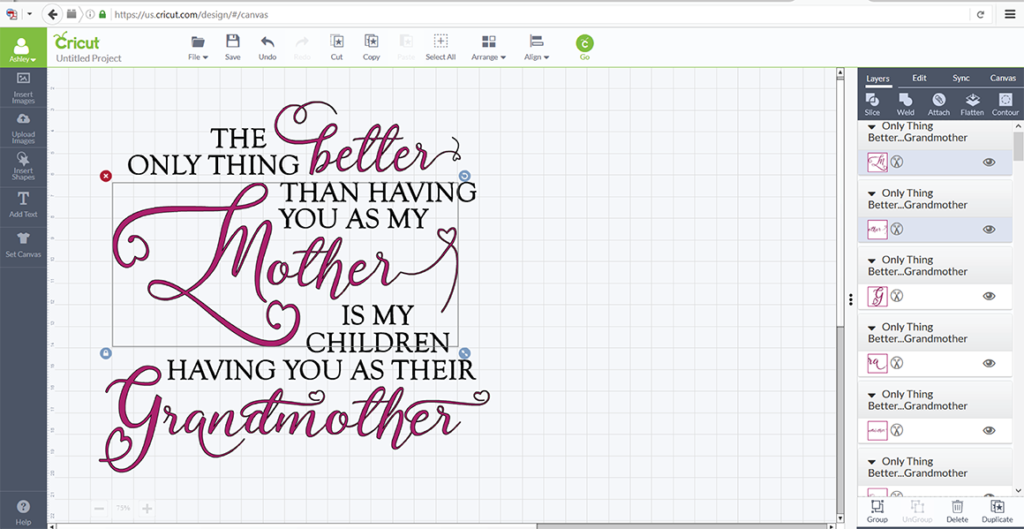
Although SVG files are ready to cut, sometimes some manipulations are needed in order for them to cut properly. In this guide, we will be taking a look at the need to ‘Attach’ files. Not all files will require attaching, but many will. We will use this Mother/Grandmother design to demonstrate. The design is uploaded to the Design Space library and then added to the canvas to begin working with. Looking at the Layers panel on the right-hand side, you can see that there is a large drop-down of pieces that are part of the design. The letters are all shown individually because they are all separate parts.
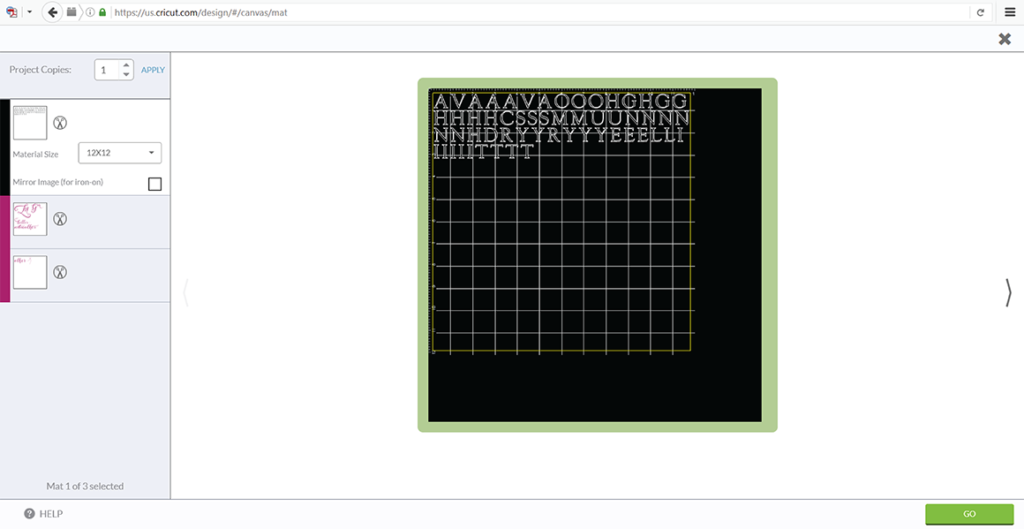
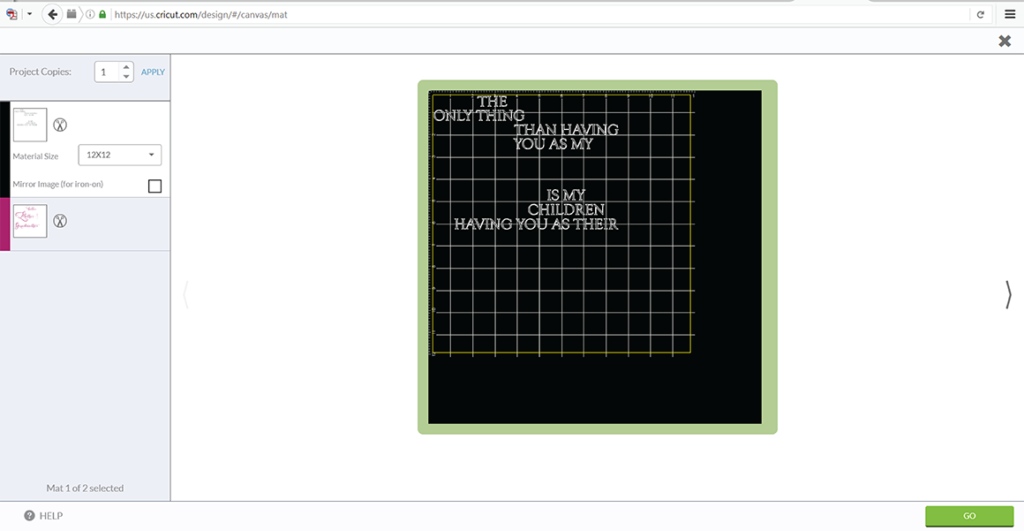
Clicking on ‘Go’ will help us visualize exactly what the difficulty would be here if we were to send this design to our cutter as is. On the first mat, all of the letters that are black in our original design are lined up so space is not wasted. But just think of how long that would take to apply each of those letters to your project individually! Clearly, we need to make an edit somewhere.
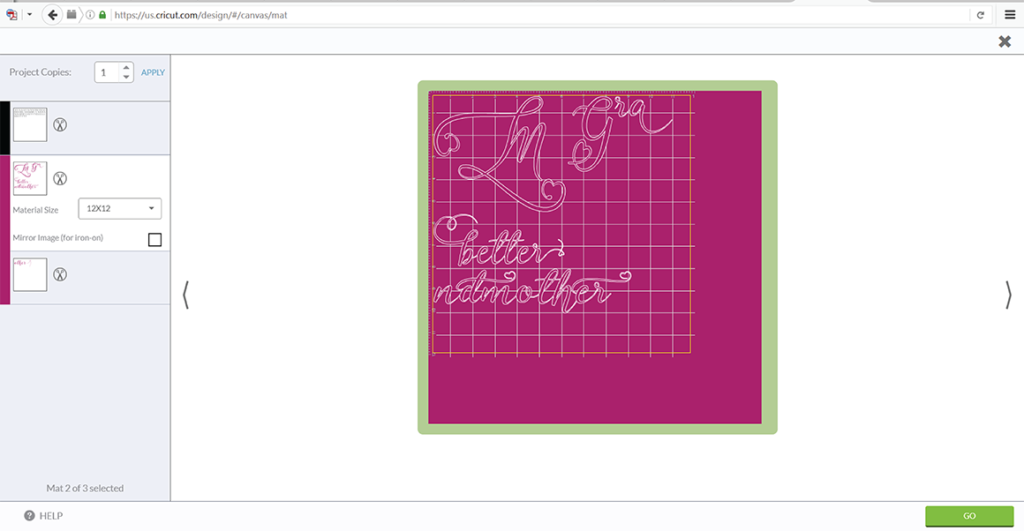
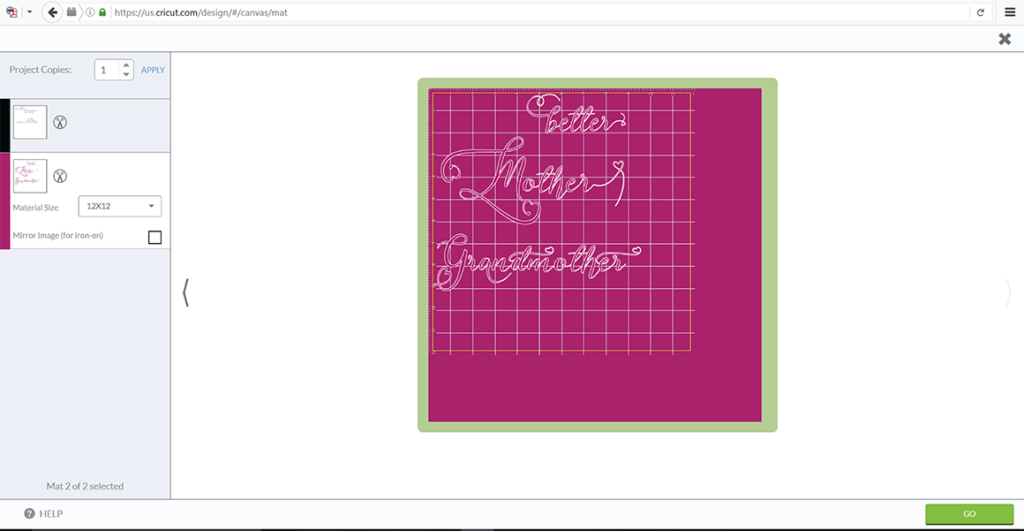
The second mat shows all of our pink letters, but they are definitely not laid out to make things easy for us to apply to our project either.
Let’s exit out of those screens and go back and make some edits to our design so they are laid out on our cutting mat exactly as they are laid out on our screen. Since we will be cutting our vinyl in two colors, we will need to create two attached layers. Starting with the pink layer, we need to attach all of those pieces to make them one big piece. Looking at the top word ‘better,’ you can see that is already one piece. If we were to move it off the mat, the whole word would move as one. It is a welded piece, so it is already attached. But looking at the next pink word ‘Mother,’ you can see two pieces, the ‘M’ and then ‘other.’ These two need to be attached as one, so select them both at the same time (hold down on the Shift key while selecting them), and in the right hand panel, simply select ‘Attach.’ They are now one piece that you can move freely around the mat. Repeat for ‘Grandmother.’
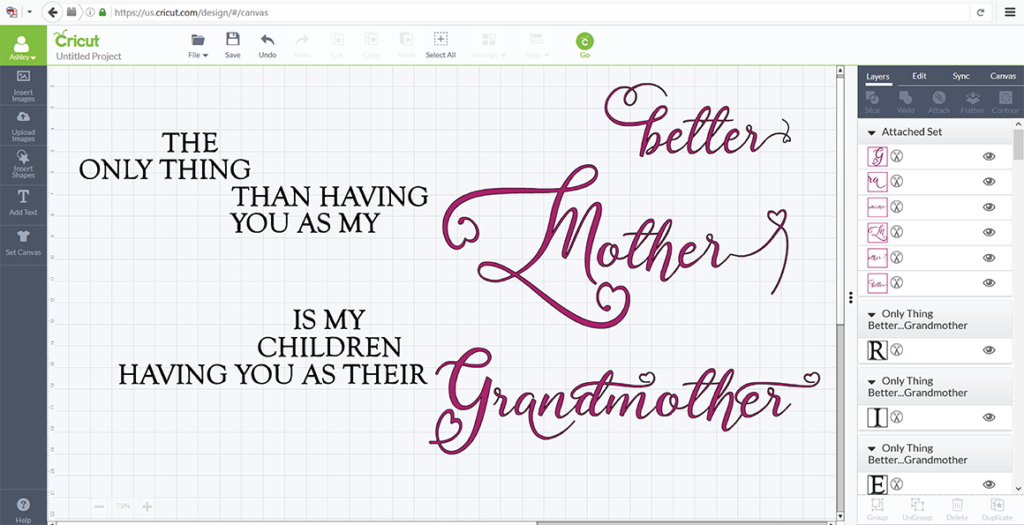
Now we should attach all three of those pieces to create an attached set. Select them all, then just hit the ‘Attach’ option to group them. If you wanted to, you could move this piece as one around the mat seen below. You can see in the Layers panel that these three words are now part of an attached set.
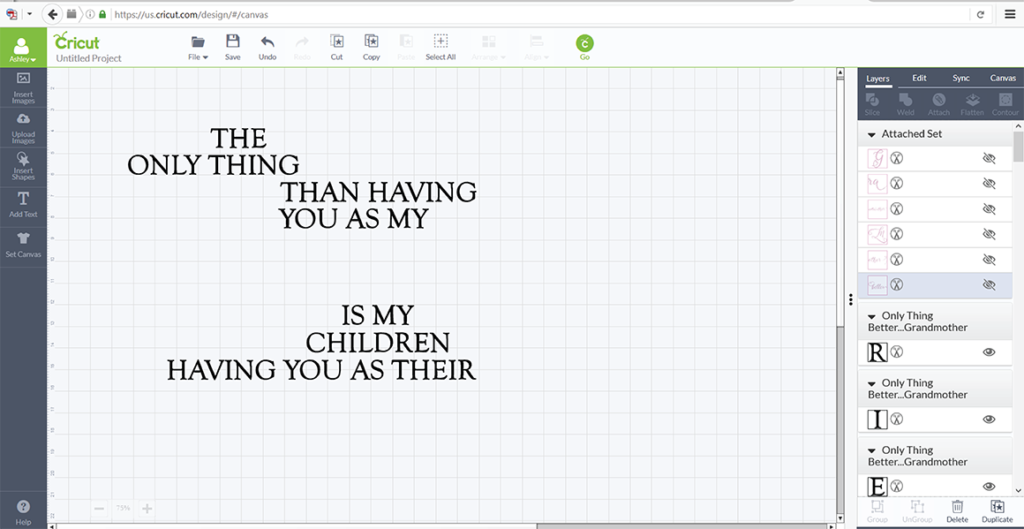
Next we need to attach all of the black letters as one piece. The easiest method to do this would be to utilize the little eyeballs that are to the right of each layer in the Layers panel. We would like to hide the pink layer from view, so we will press the eyeball next to each piece of the attached set until everything disappears. Now the only thing we can see on our mat are the black letters because the pink layer is hidden from view.
Draw a bounding box around all of the black letters to select them all, then select ‘Attach’ just like we did the pink letters.
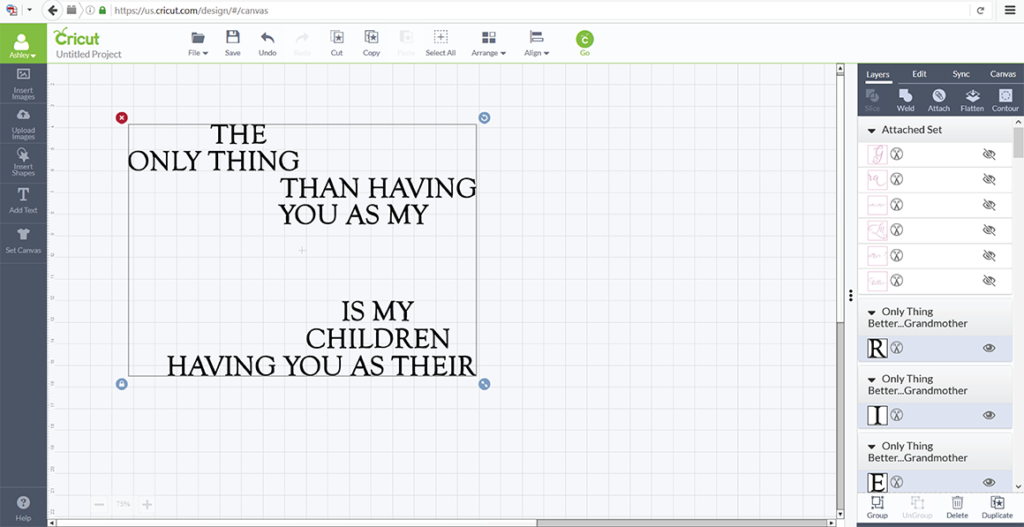
You will now see those letters as an attached set in the left hand Layers panel. You can move this piece as one if needed.
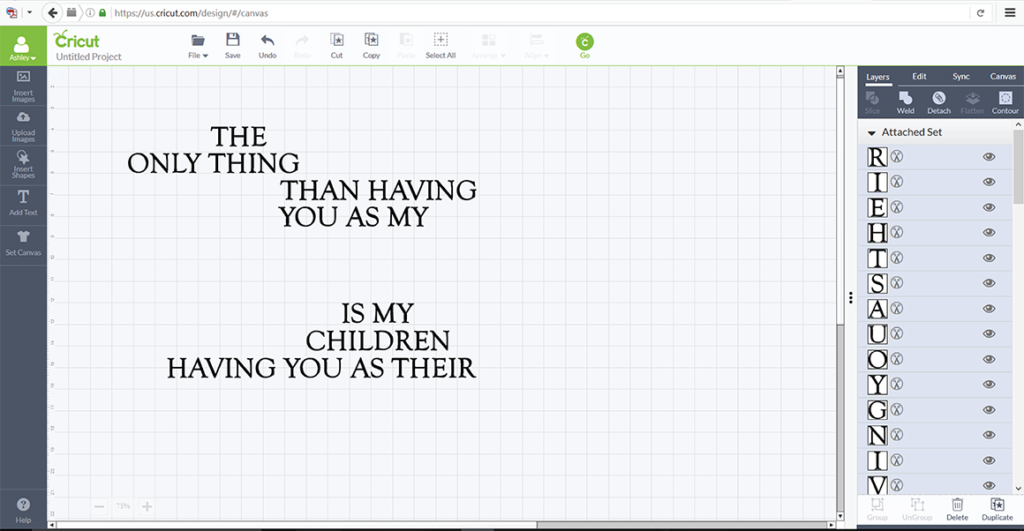
We are ready to bring that hidden layer back into view now, so we can go back to the pink attached set, and uncheck the eyeball for all those pieces.
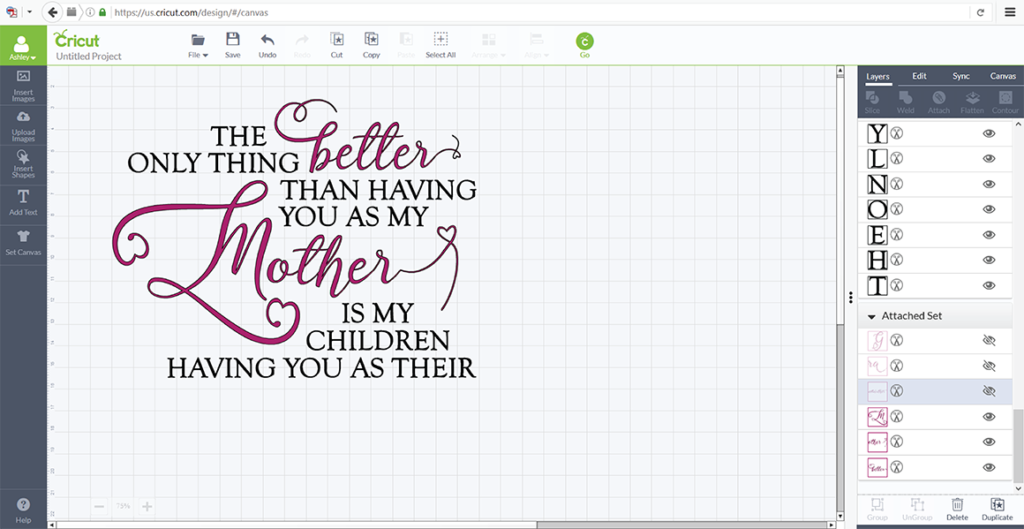
Now we are ready to cut! Just resize your design so it fits your project and send to your cutter. You will see two mats, one for each color, and all your pieces will be laid out appropriately for easy layering to your project.
Love this design as much as I do? You can purchase it from the designer here, with commercial use.
Crazy about that swirly heart font? I know I am! You can support the font creator and add this beauty to your collection here.
