How to access alternate characters in fonts
I am addicted to fonts! I can’t stop purchasing them, and I likely won’t be stopping anytime soon. Playing with each font and discovering its capabilities is the best part! Many have extra characters, glyphs, and swashes that help add a little pizazz to any design. BUT, having the right program to work in may be necessary to utilize all of each font’s features. Because of the growing popularity of vinyl crafting and the like, many font designers now code their fonts specifically for us crafters. If you will be using only Silhouette or Design Space in your crafting, when purchasing any new font, always check to see if it is PUA-encoded. These fonts will work in crafting cutters with just a few extra steps.
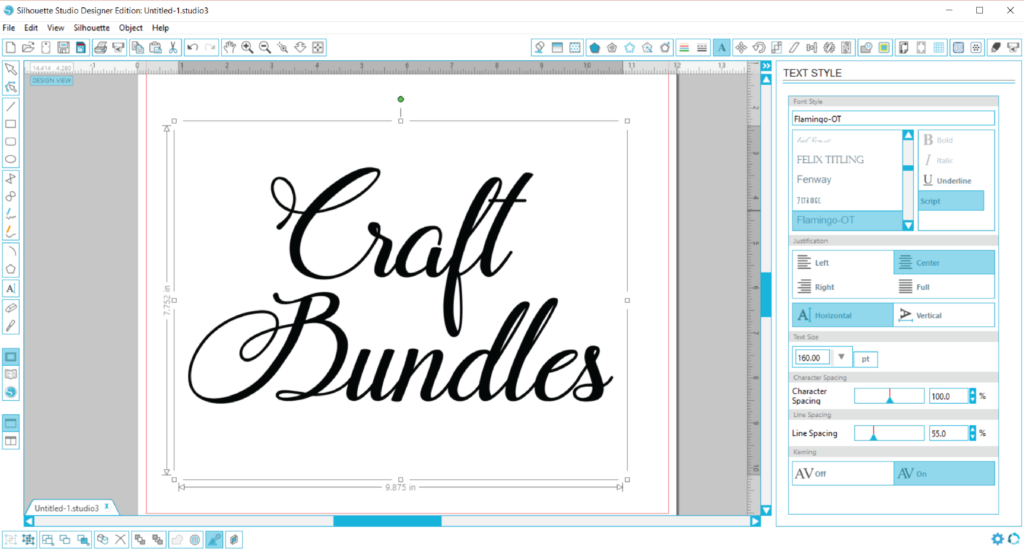
In this guide, we will use the Flamingo font. It has lots of alternate characters. We will also be using Silhouette Studio to demonstrate, however if you use another program like Cricut Design Space, the process is the exact same. You are essentially utilizing a copy/paste method from one program into the other, so instead of pasting into Silhouette, you would just do so in Design Space. This will make more sense as you read, but just remember, the process is the same.
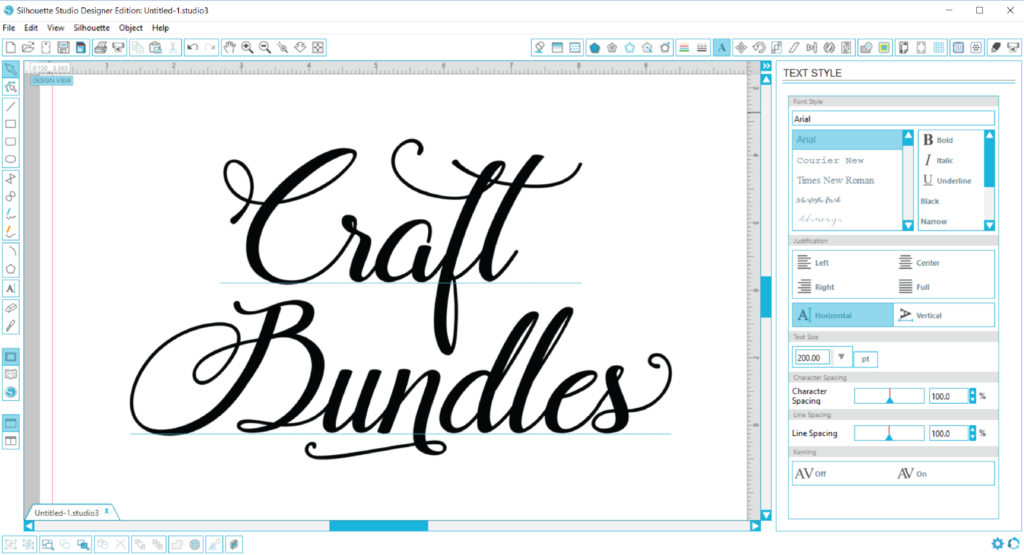
Open your program and use the Flamingo font to type out your text. The text typed will not be fancy with swashes yet, but we will change some of the letters to add those alternate characters in the following steps.
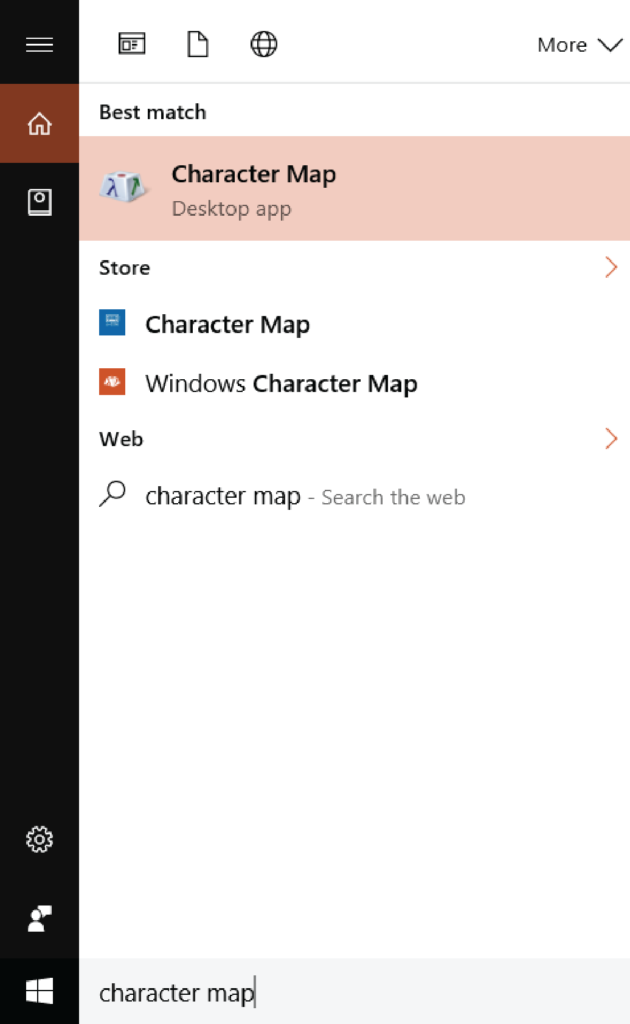
Now, in order to access the glyphs for each font, you need to utilize your computer’s character map. This is a pre-installed program on your computer, so you do not need to download anything. All you need to do is open it. Doing a quick search for the program will locate it without much work. Just open your computer’s search bar and type in “Character Map.” In Windows 10, it is shown as a desktop app when searching like the below photo. Just click on it to launch the program.
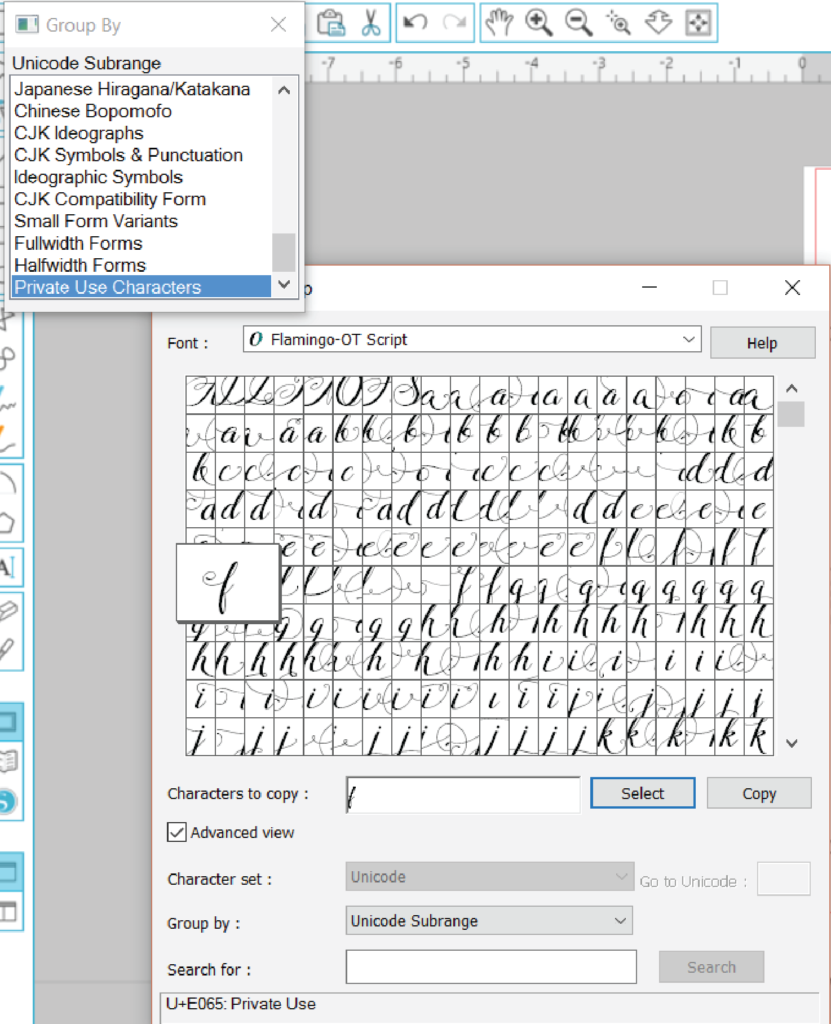
After opening, you will see a dropdown that includes all system fonts. Search for the font you need. In this example, we located the Flamingo font and selected it. Also, make sure the box for Advanced View is checked. Your computer may already have it checked by default.
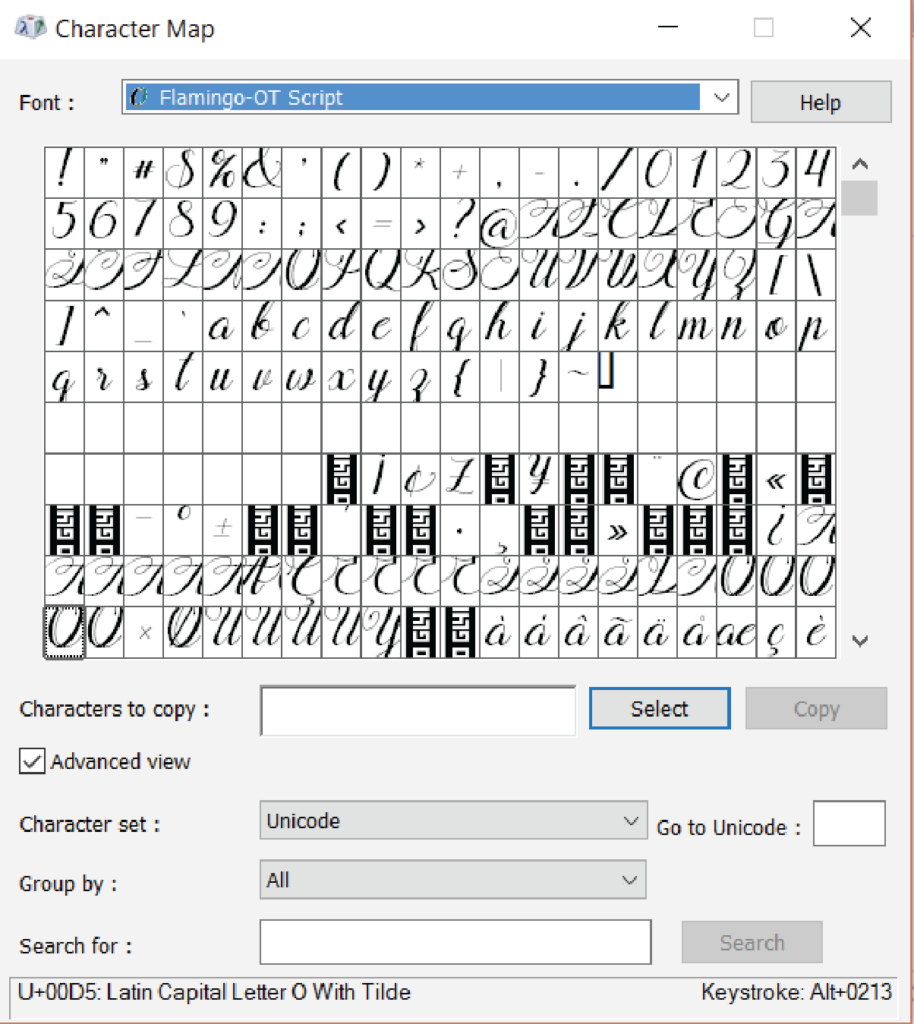
Next, in the Group By dropdown, scroll down until you find “Unicode Subrange” and select it.
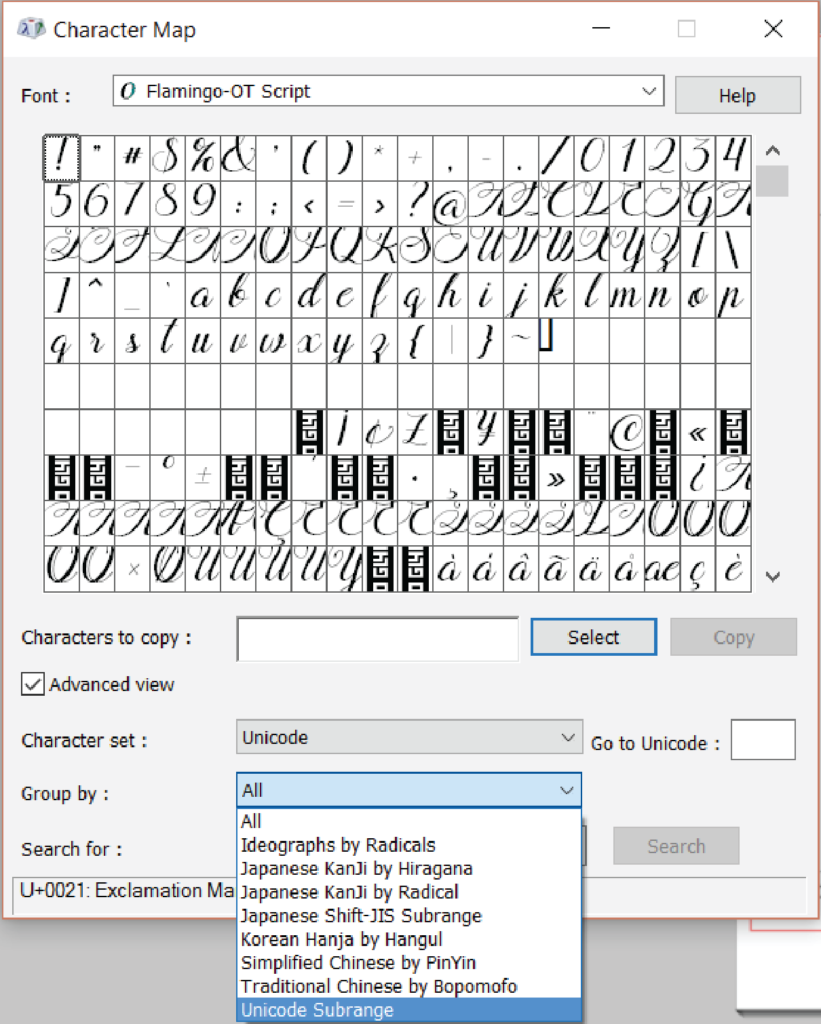
A new box will pop up for the Group By options. You will want to select Private Use Characters from that dropdown. You may need to scroll all the way to the bottom to locate this option. Once that is selected, you will notice all the font’s alternate characters will pop up. Exciting, but so many choices!
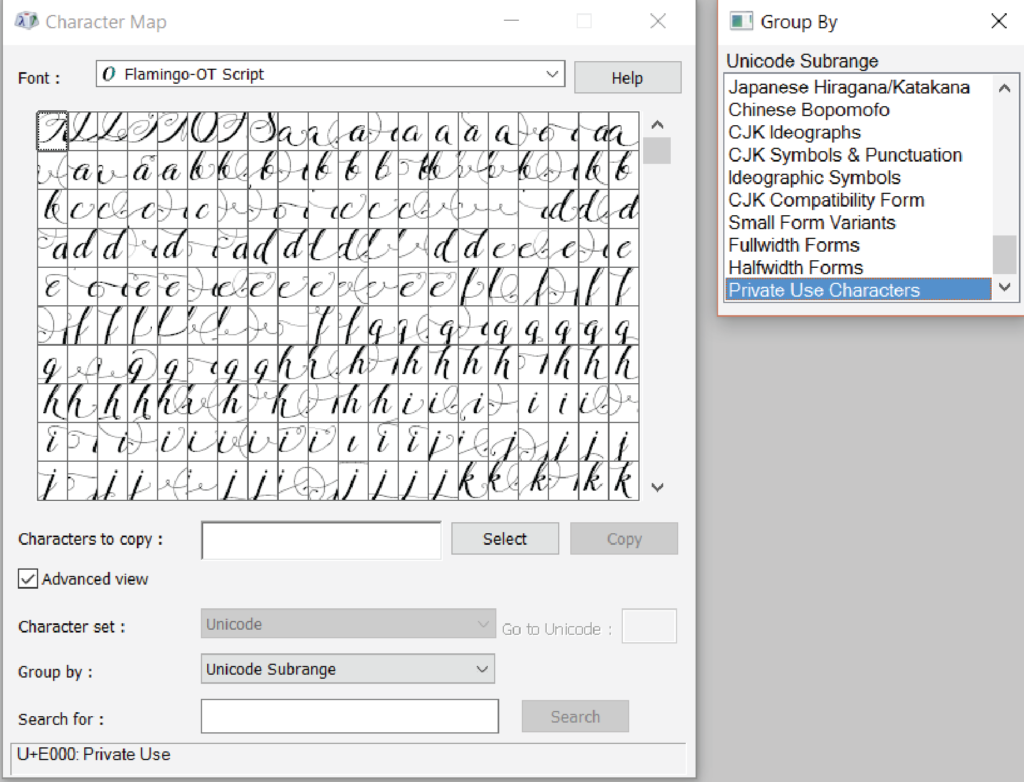
From here on out, it may be a trial and error quest for you until you find the character that looks best in your text. You can click each glyph and enlarge it slightly to see it a little better. In this case, I would like an alternate letter ‘f,’ so I locate one I believe may look well in my text.
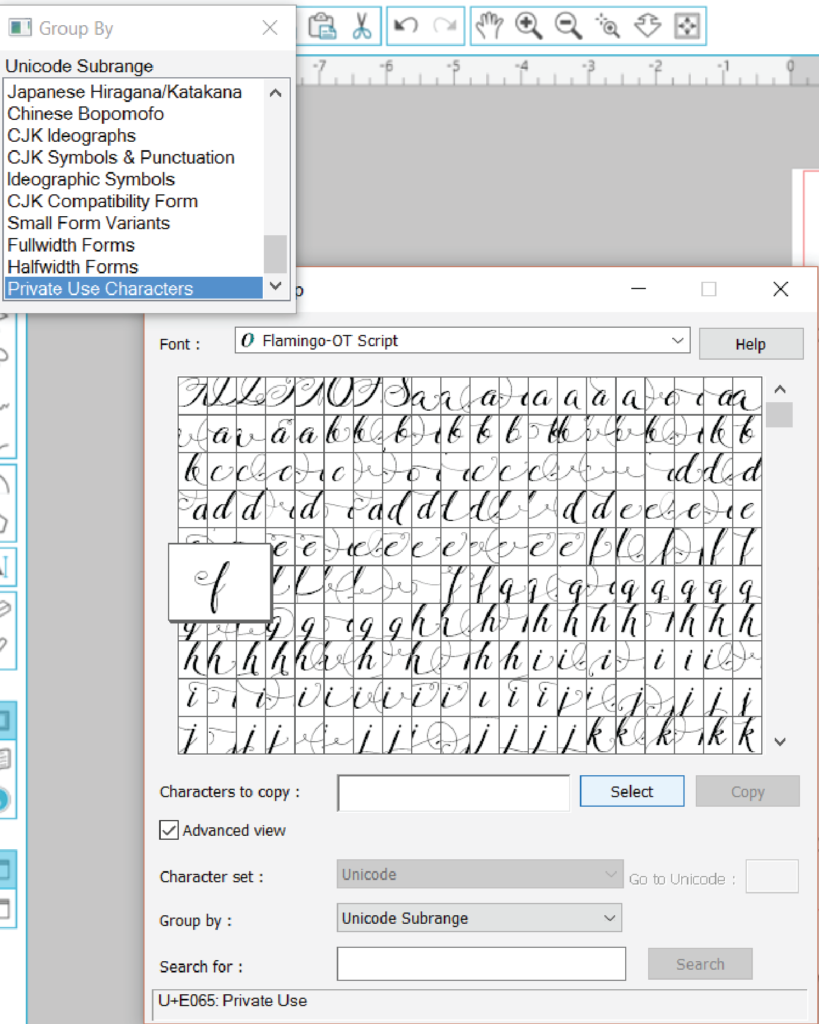
When you locate a glyph you want to try, make sure it is enlarged, and then click the Select button. This will add it to the Characters to Copy box. Then click Copy. Doing so will copy it and add it to your clipboard for pasting elsewhere.
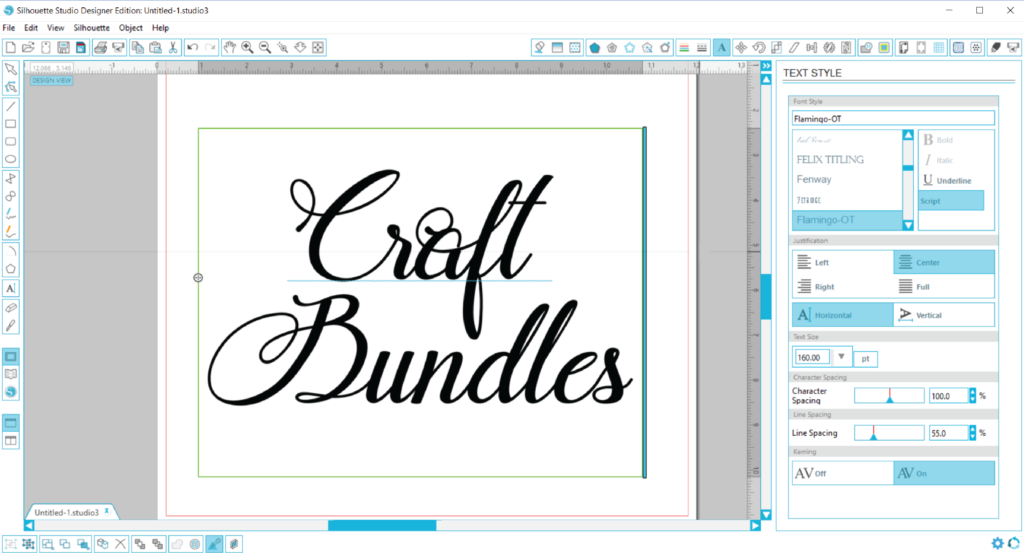
Open your program and locate the ‘f’ you want to change. Highlight the letter and then paste your new letter in its spot. Pasting can be done by right clicking and selecting Paste in Silhouette or simply using the keyboard shortcut Control + V. Remember, this process is the same in Cricut Design Space and many other programs.
In this case, this particular letter ‘f’ glyph we chose was probably not a good choice. There are other glyphs that would work better in this text.
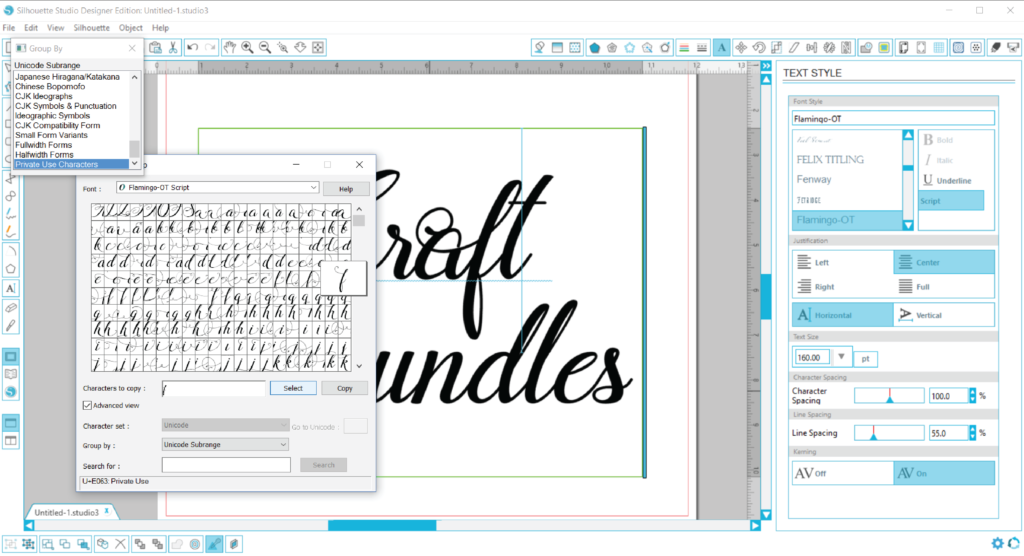
To try another letter choice, go back to the Character Map program and locate a second glyph and repeat the steps. Once you find one you like, click the Select button and then choose Copy.
Go back to your design, highlight the letter you want to replace, and paste the new one in. Much better placement of the swirl!
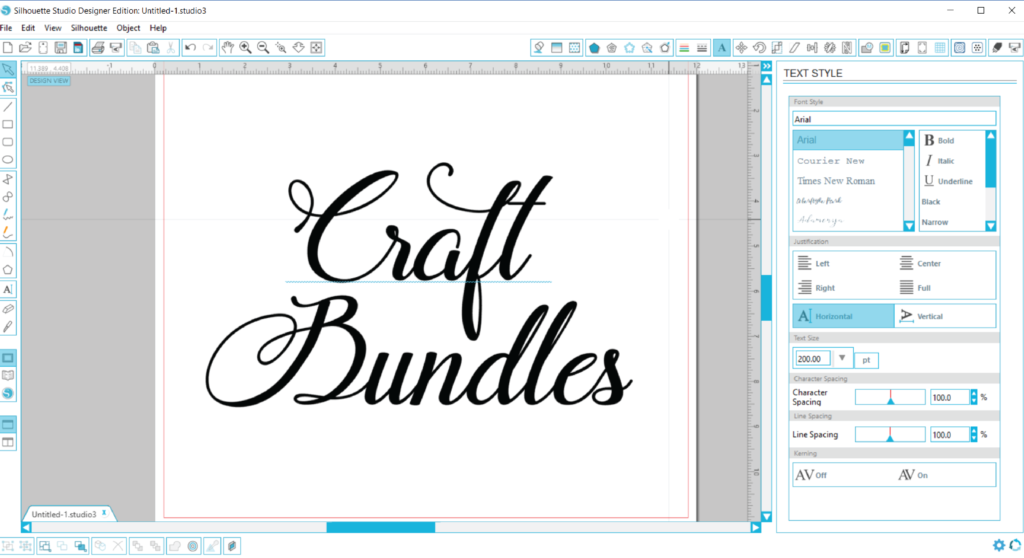
Now, just repeat as desired. Some fonts include dingbats and swashes. You can copy/paste many letters at once or just one at a time. Some have literally thousands of alternate characters. Just remember that the font must be PUA-encoded to be able to utilize the Character Map to access the font’s glyphs. Not all font designers code their fonts this way, but more and more these days are making their fonts crafter-friendly. Score for us!
How To Install Fonts on Windows and Mac
Below is a detailed guide on how to install fonts across a range of operating systems for both Windows and Mac computers.
When installing any font on to your desktop computer its important for us to point out, fonts get installed directly onto your hard drive and not via any program you may use. This is so these fonts appear in all programs you may wish to use them on, rather than having to install them on each program one by one. Once you have downloaded the files provided by our website, please ensure you save them somewhere memorable, ready for install.
For desktop use, please ensure you only install either the OTF or TTF font files. Other formats included are specifically for web development and design only.
WINDOWS VISTA, 7 & 8
- Click the Start Button (located in the bottom left corner of your screen)
- Click Control Panel
- Click Apperance and Personlization
- Click Fonts
- Now copy and paste the relevant OTF or TTF file (either, but only one) for each font from the downloaded file to the Fonts folder we just opened.
- Please note, to ensure these fonts appear in your programs, you may need to restart your computer.
- To speed up this process, please view the Quick Install folder, (included in your download) and copy and paste 10 fonts across at once.
WINDOWS 10
- Locate either the OTF or TTF file for the font you wish to install and double click.
- This will bring up a new pop up window giving you a quick preview of the characters included. At the top it will ask you to install this font.
- Simply click install.
Please note, to ensure these fonts appear in your programs, you may need to restart your computer.
To speed up this process, please select 5- 10 fonts at once (included in your download) and double click on one of the selected items to bring up multiple installation windows.
WINDOWS XP
- Click the Start Button (located in the bottom left corner of your screen)
- Click Control Panel
- Click Fonts
- Now copy and paste the relevant OTF or TTF file (either, but only one) for each font from the downloaded file to the Fonts folder we just opened.
Please note, to ensure these fonts appear in your programs, you may need to restart your computer. To speed up this process, please view the Quick Install folder, (included in your download) and copy and paste 10 fonts across at once.
MAC COMPUTERS
- Locate either the OTF or TTF file for the font you wish to install and double click.
- This will bring up a new pop up window giving you a quick preview of the characters included. At the bottom of this window, you will see a small button asking if you want to install.
- Simply click Install.
Please note, to ensure these fonts appear in your programs, you may need to restart your computer. To speed up this process, please select 5- 10 fonts at once (included in your download) and double click on one of the selected items to bring up multiple installation windows.
Should double clicking not bring up your FontBook program, please manually open up FontBook from your Applications folder. Then drag the OTF or TTF file into the central column (fonts list) of your FontBook Program.
